
Provenance
About these photographs. The frames below are from rodent work we have actually completed — not stock photography, and not somebody else's gallery. Each one is captioned by work type only: no dates, no addresses, no neighbourhoods and no customer names, because a photograph is proof of a repair and not a case study about a household.
How to read a before-and-after photo
Eight tests. None of them need any expertise, and a photograph either passes them or it does not.
Is it the same spot? The single most common trick, usually unintentional. A wide "before" of a messy attic and a tight "after" of a clean corner are two photographs of two places. Look for a fixed reference in both frames — the same joist, the same vent, the same brick course, the same pipe. If you cannot line the two frames up, you are looking at a mood board.
Is it the same angle and roughly the same distance? Moving in closer removes context, and removing context is how an unfinished job passes for a finished one. A genuine pair is usually slightly awkward, because the photographer stood in the same uncomfortable position twice.
Can you see the actual repair, or only the tidy-up? Cleaning is not exclusion. A swept attic floor with the same open gable vent behind it is a photograph of housekeeping. The gap has to be in the frame.
Can you identify the material? This is the test that matters most. Steel mesh, hardware cloth and metal flashing are recognisable at a glance — grey, woven or sheet, mechanically fixed, with visible fasteners or edges. Expanding foam is beige or orange and blobby. Caulk is a smooth glossy bead. If you cannot tell what the repair is made of, ask, because the difference between those two families of material is the difference between a repair and a delay.
Is it fixed, or just placed? Look for screws, staples, clamps, crimped edges, a folded return. Material that has been pushed into a hole is material an animal can pull back out.
Does the "after" cover the whole opening? A weep hole with a cover and four more open beside it is a photograph of one weep hole. Look at the edges of the frame for the continuation of the same detail.
Is the "before" real evidence or just clutter? A dirty attic is not an infestation. Droppings, rub marks, runways compressed into the insulation, nesting balls, gnaw damage with pale edges — those are evidence. Boxes and dust are not.
Is anything in the frame that should not be? A station sitting in an "after" photo is worth a question, because a station is not a closed opening — the repair is supposed to be the thing in the picture.
Run those eight over any gallery in this industry, including ours. It is a better filter than a review score.
The photographs
Actual job photos taken by our technicians.
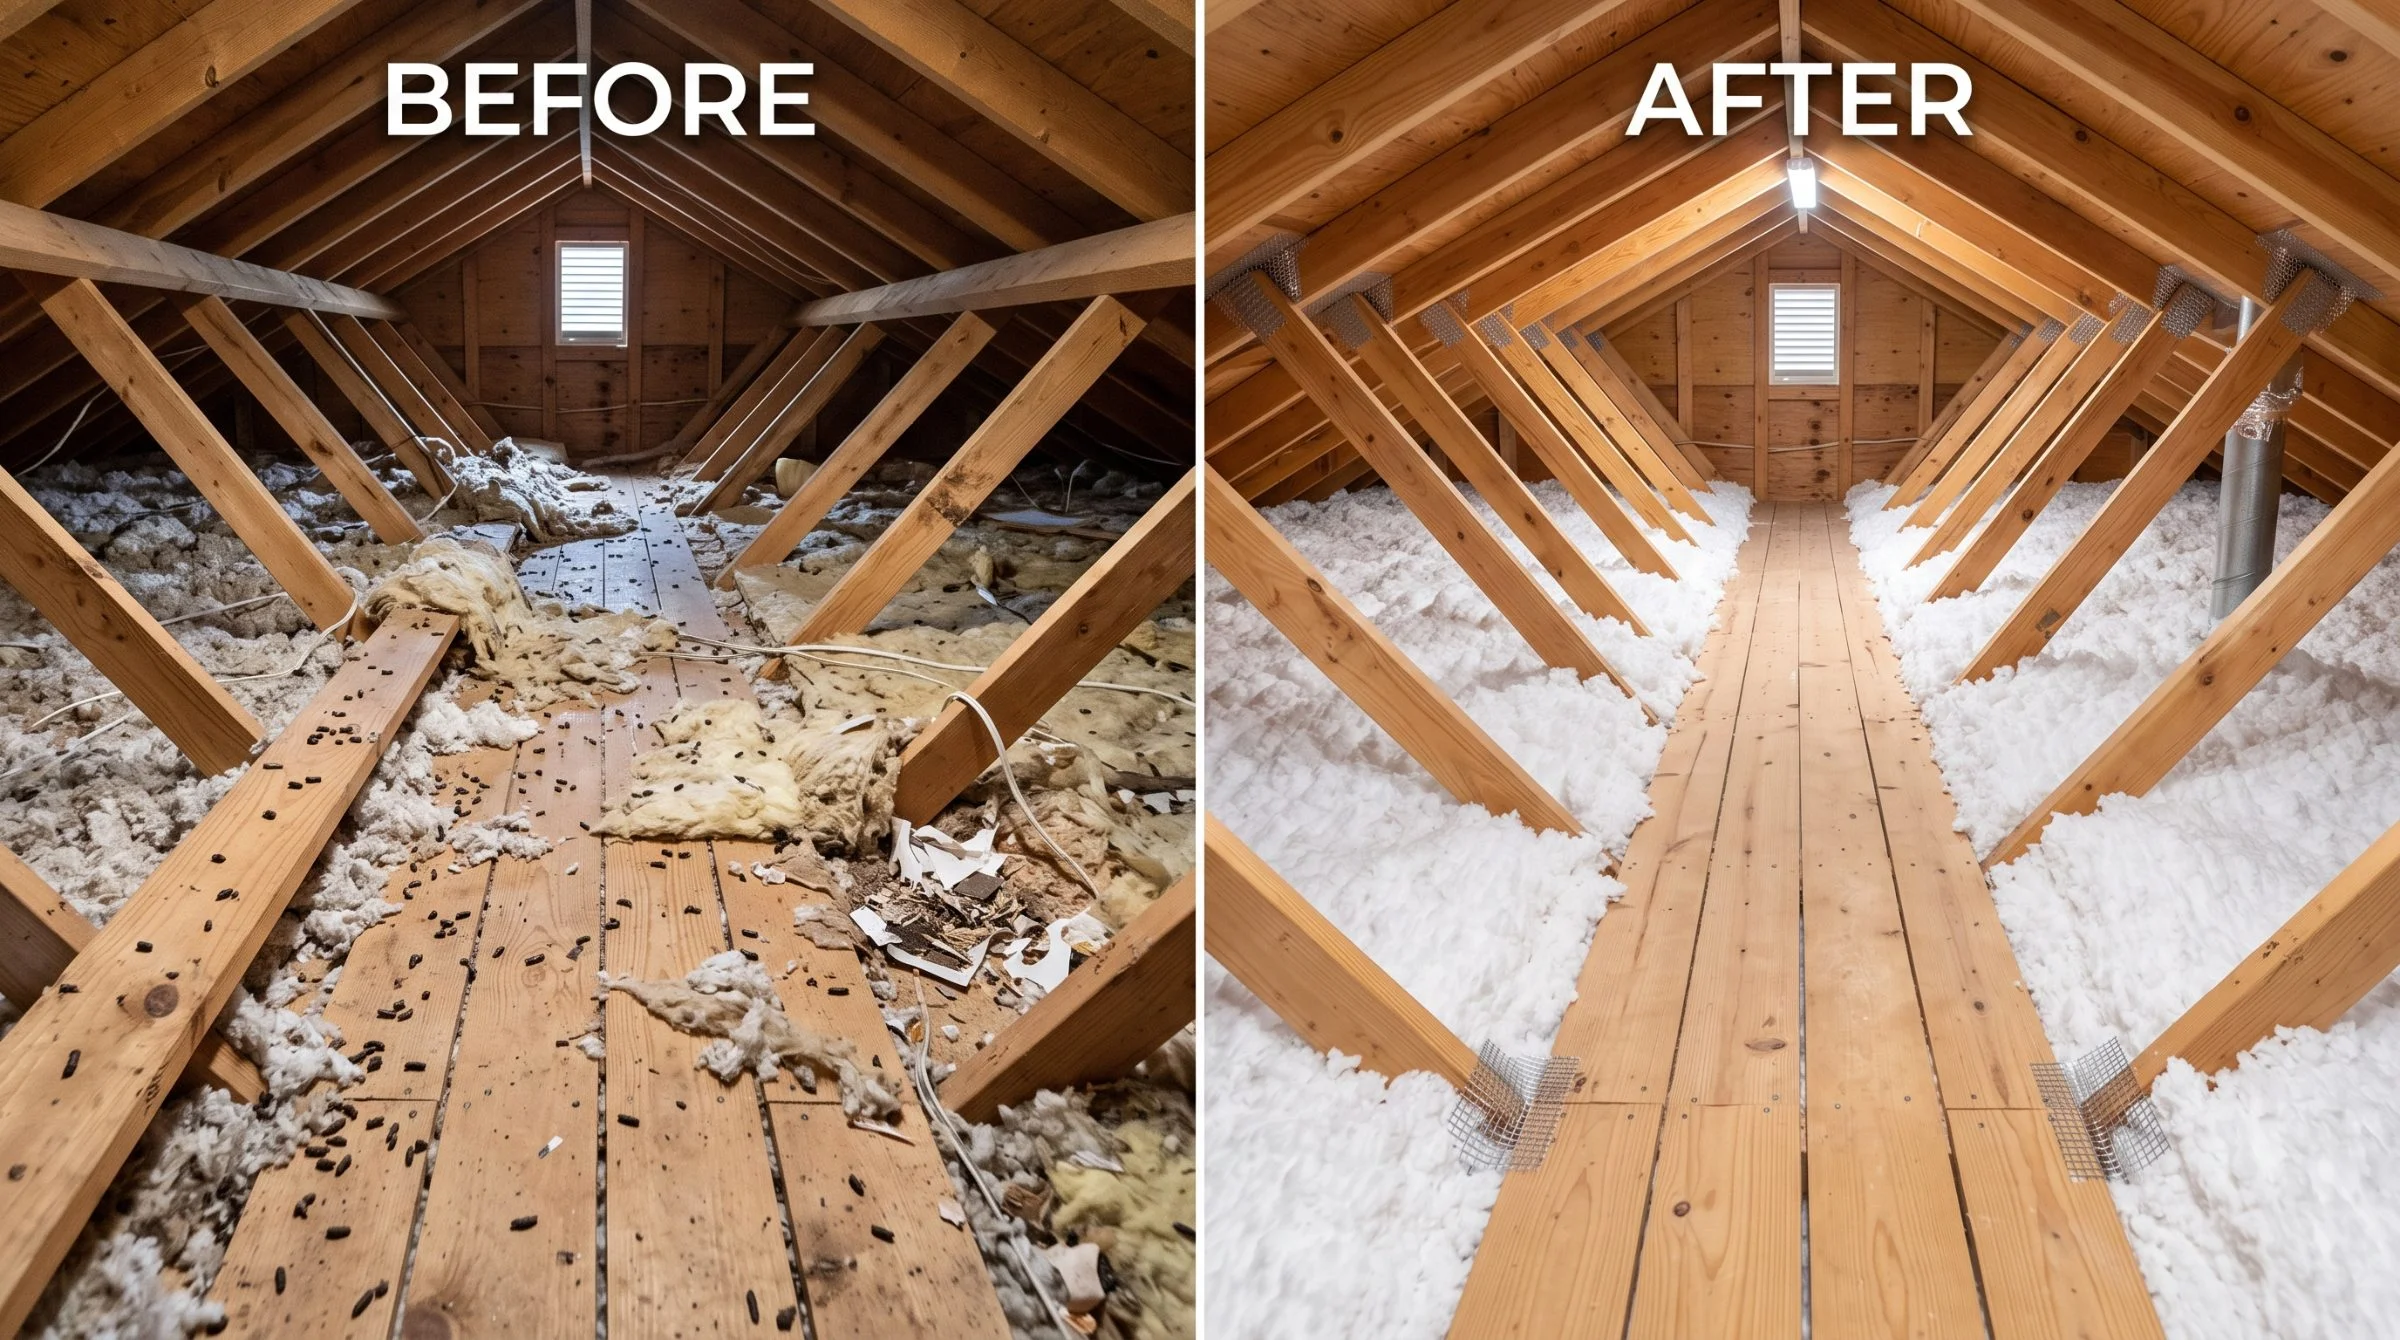
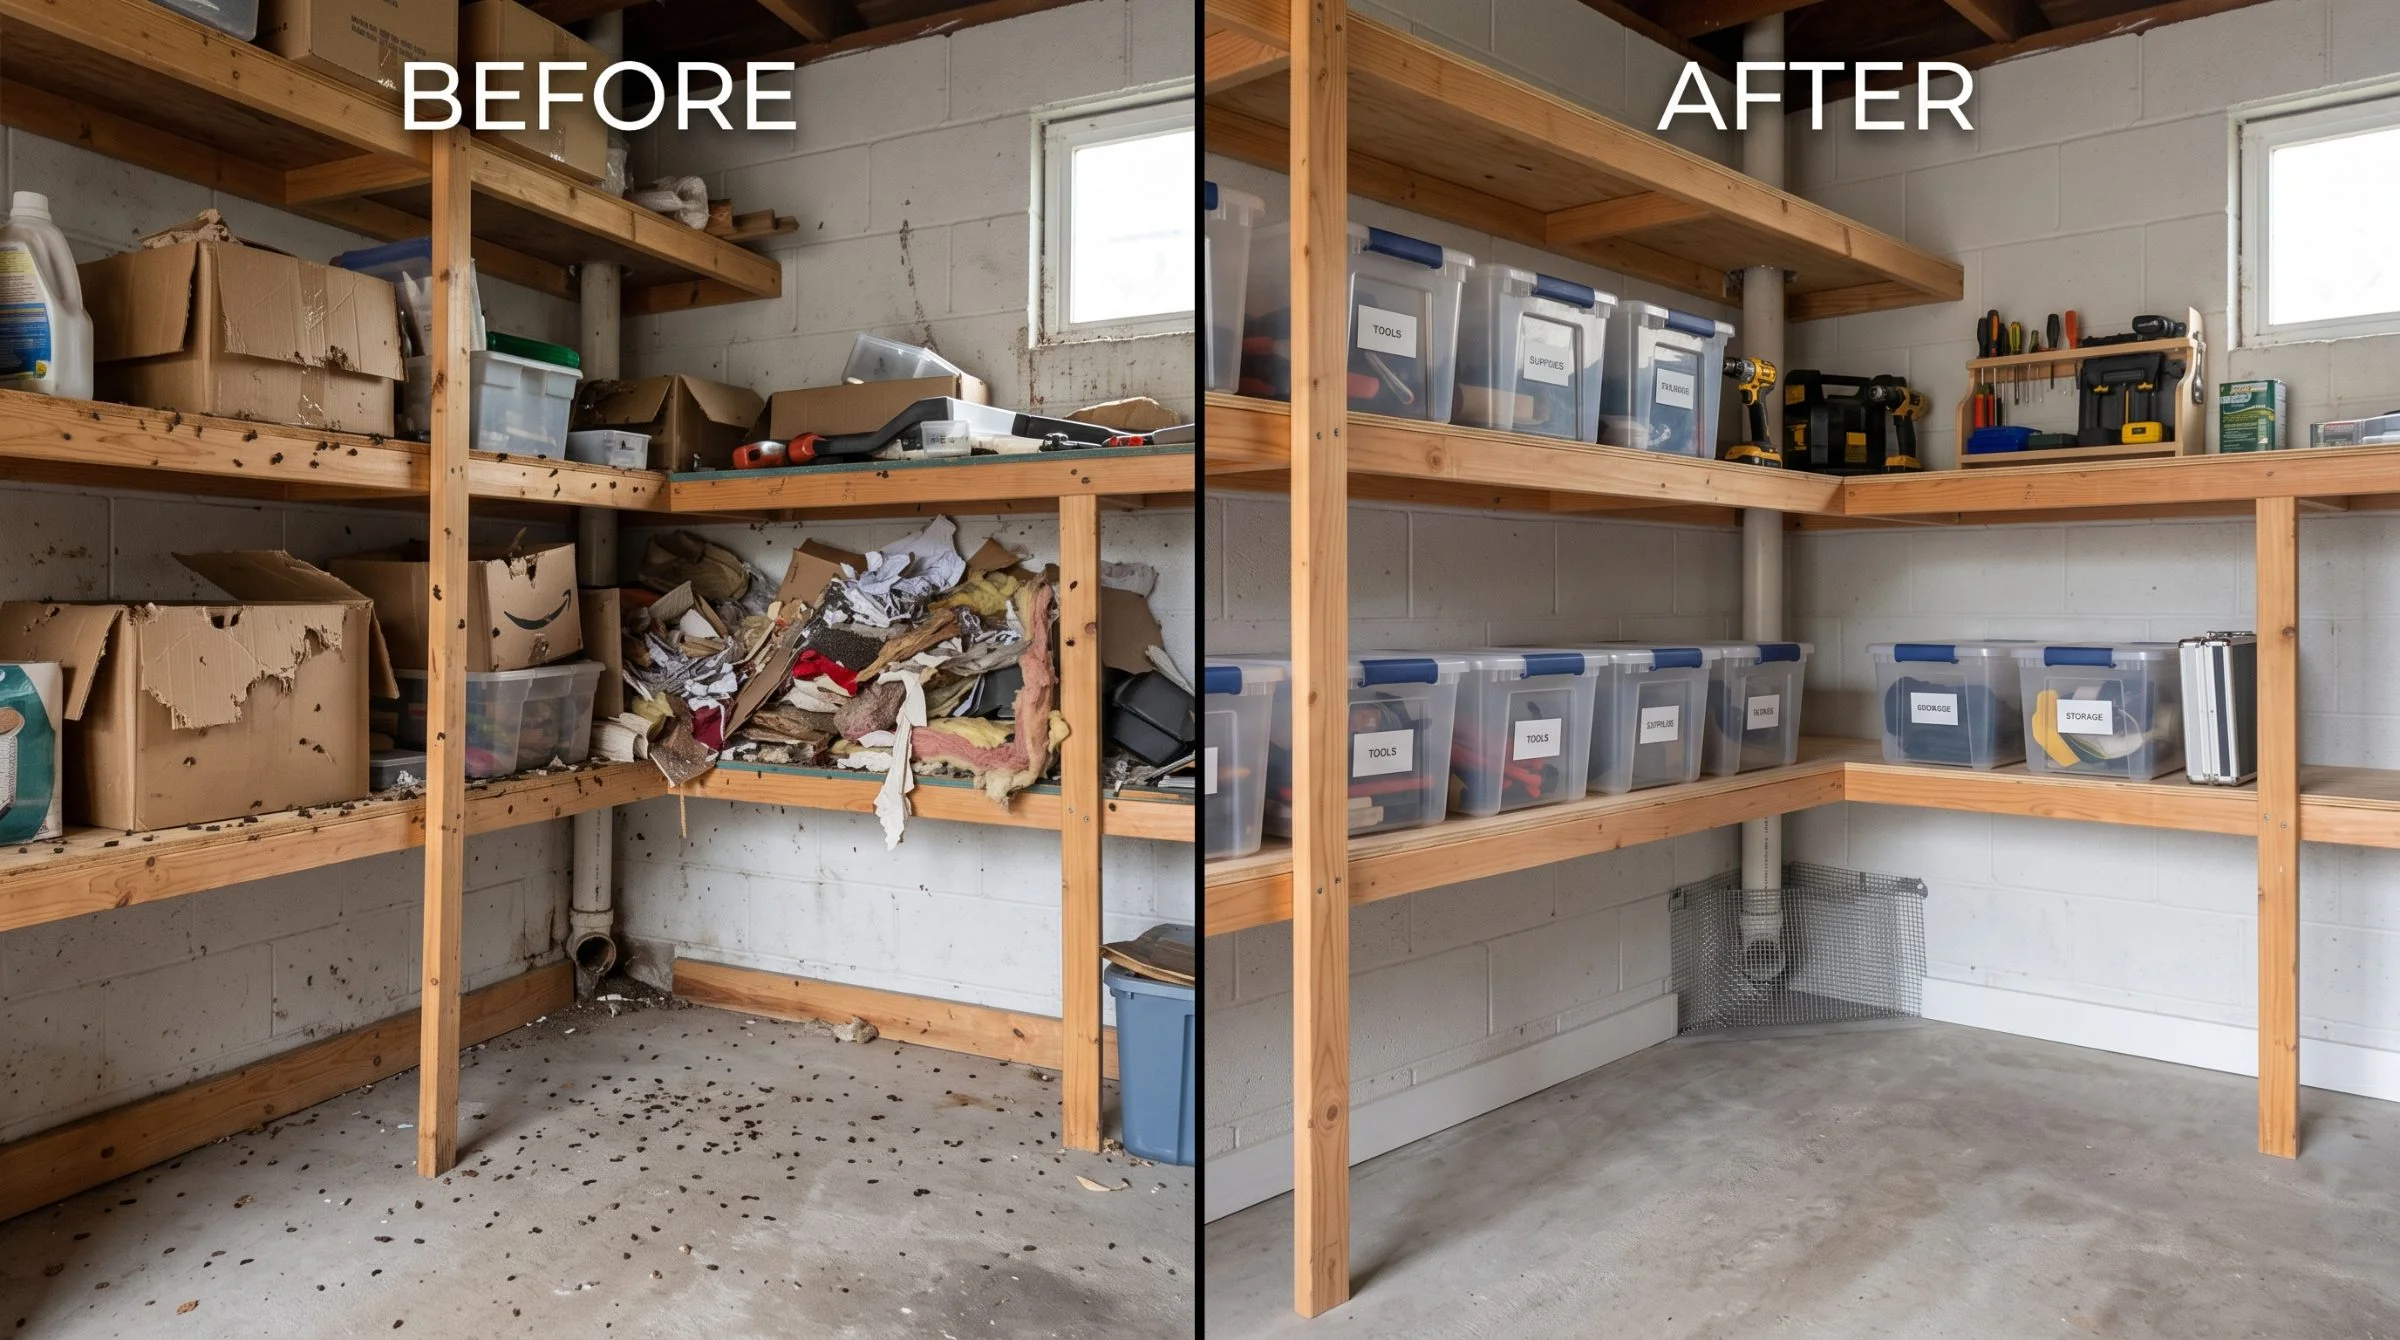
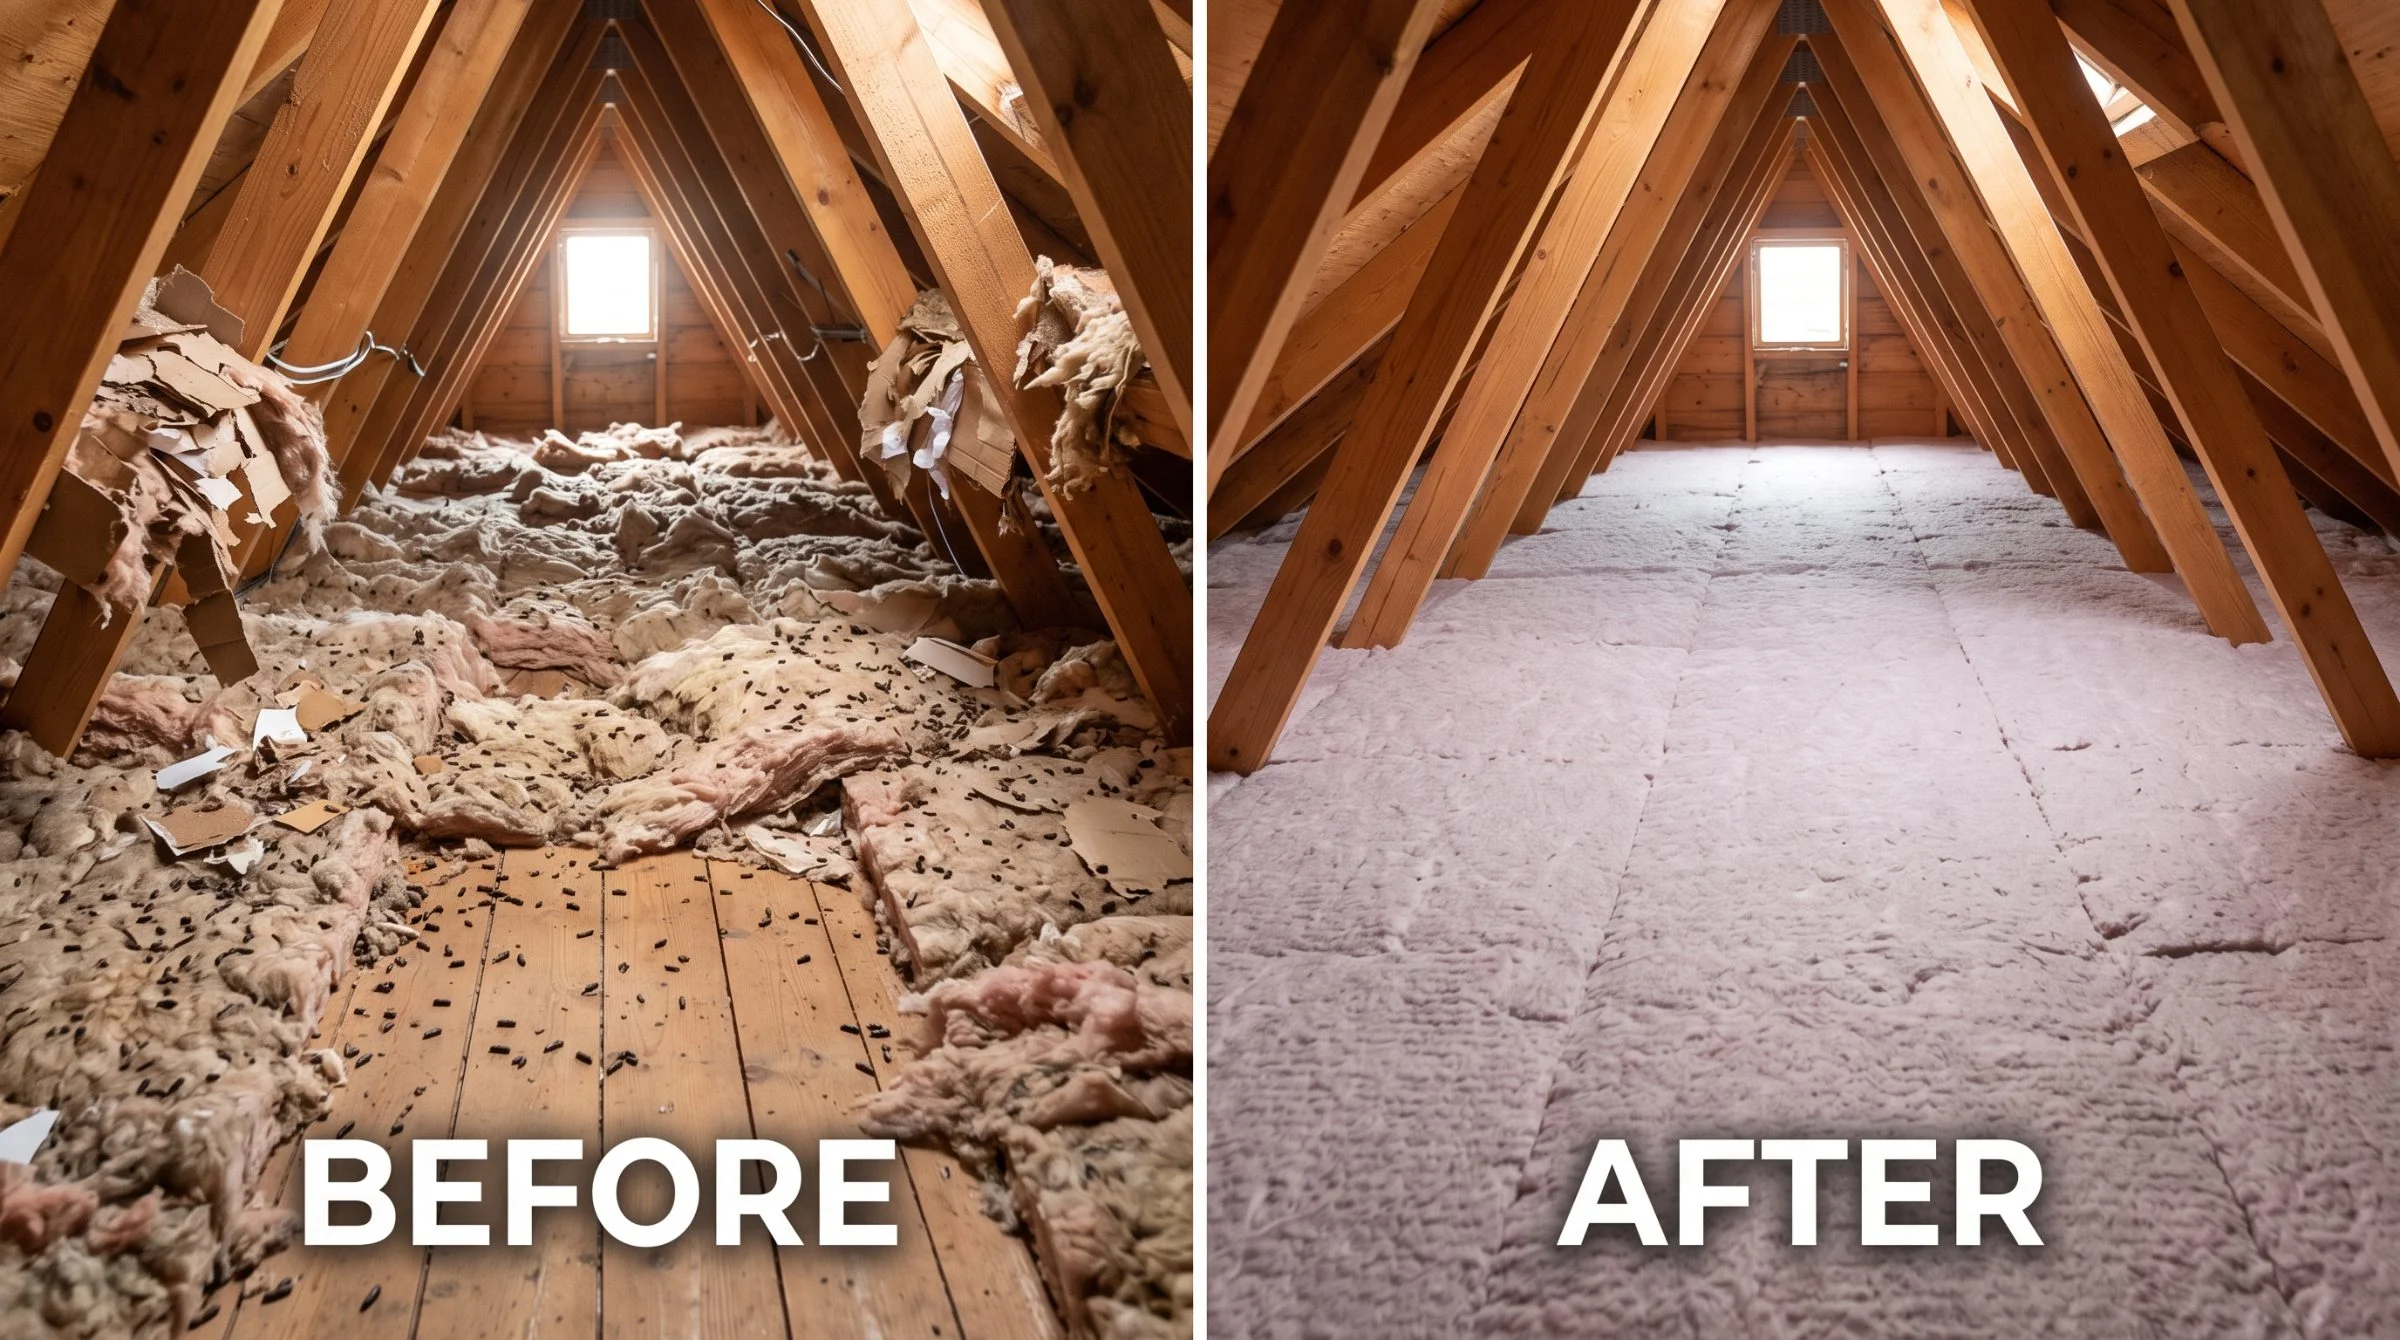
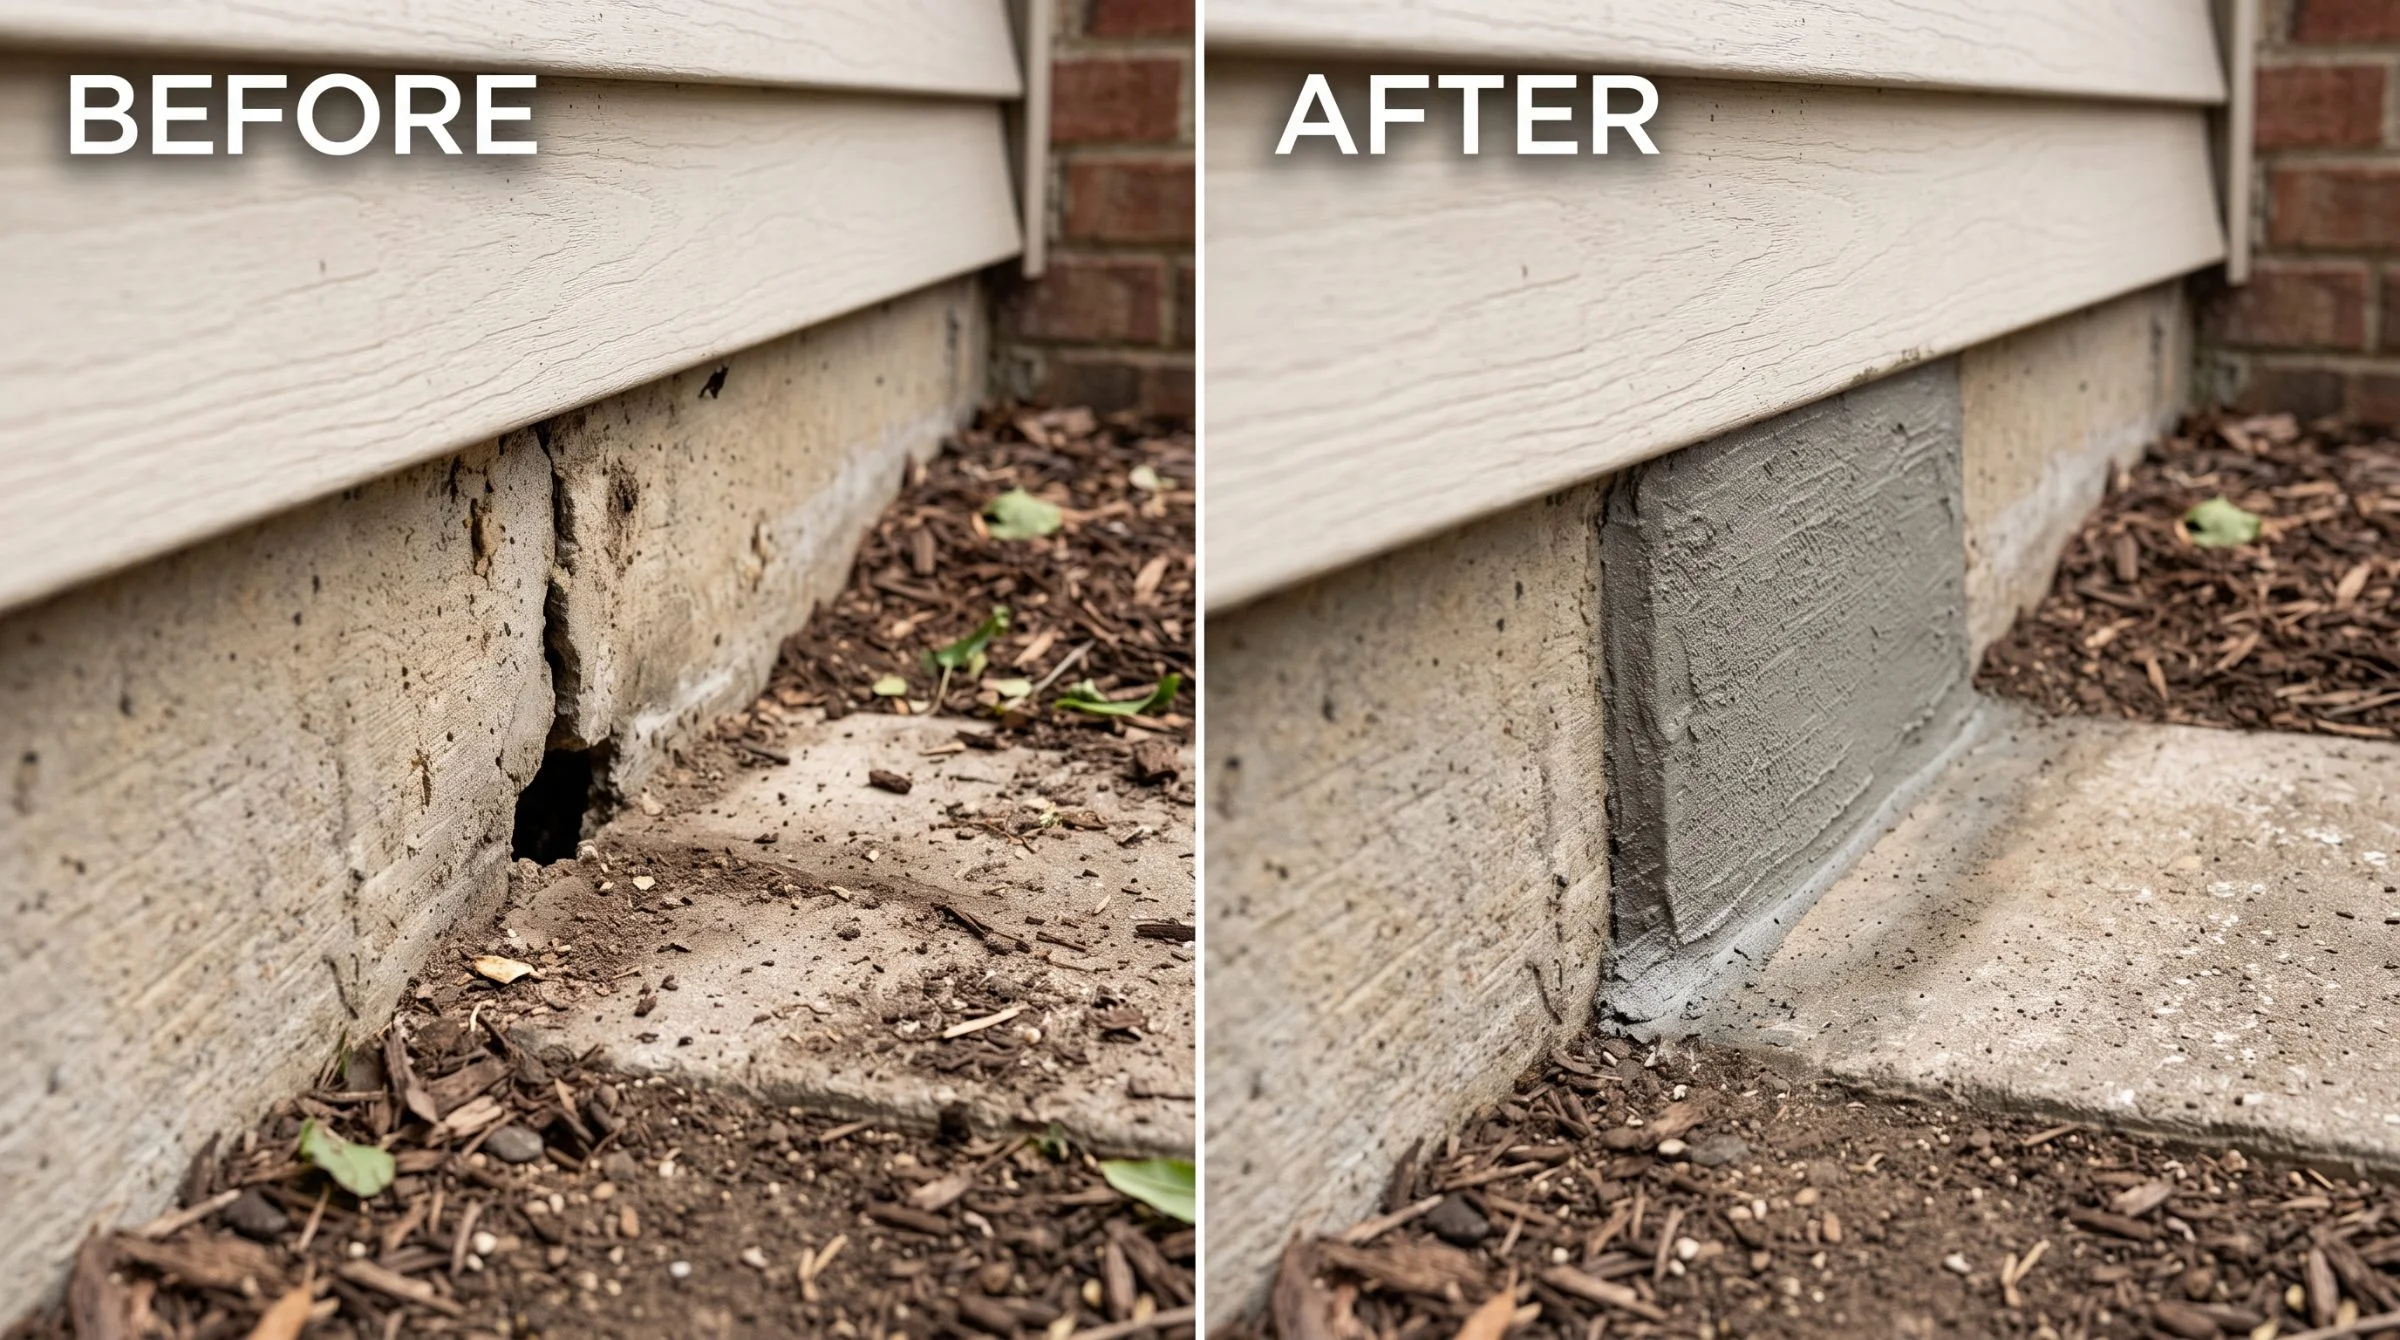
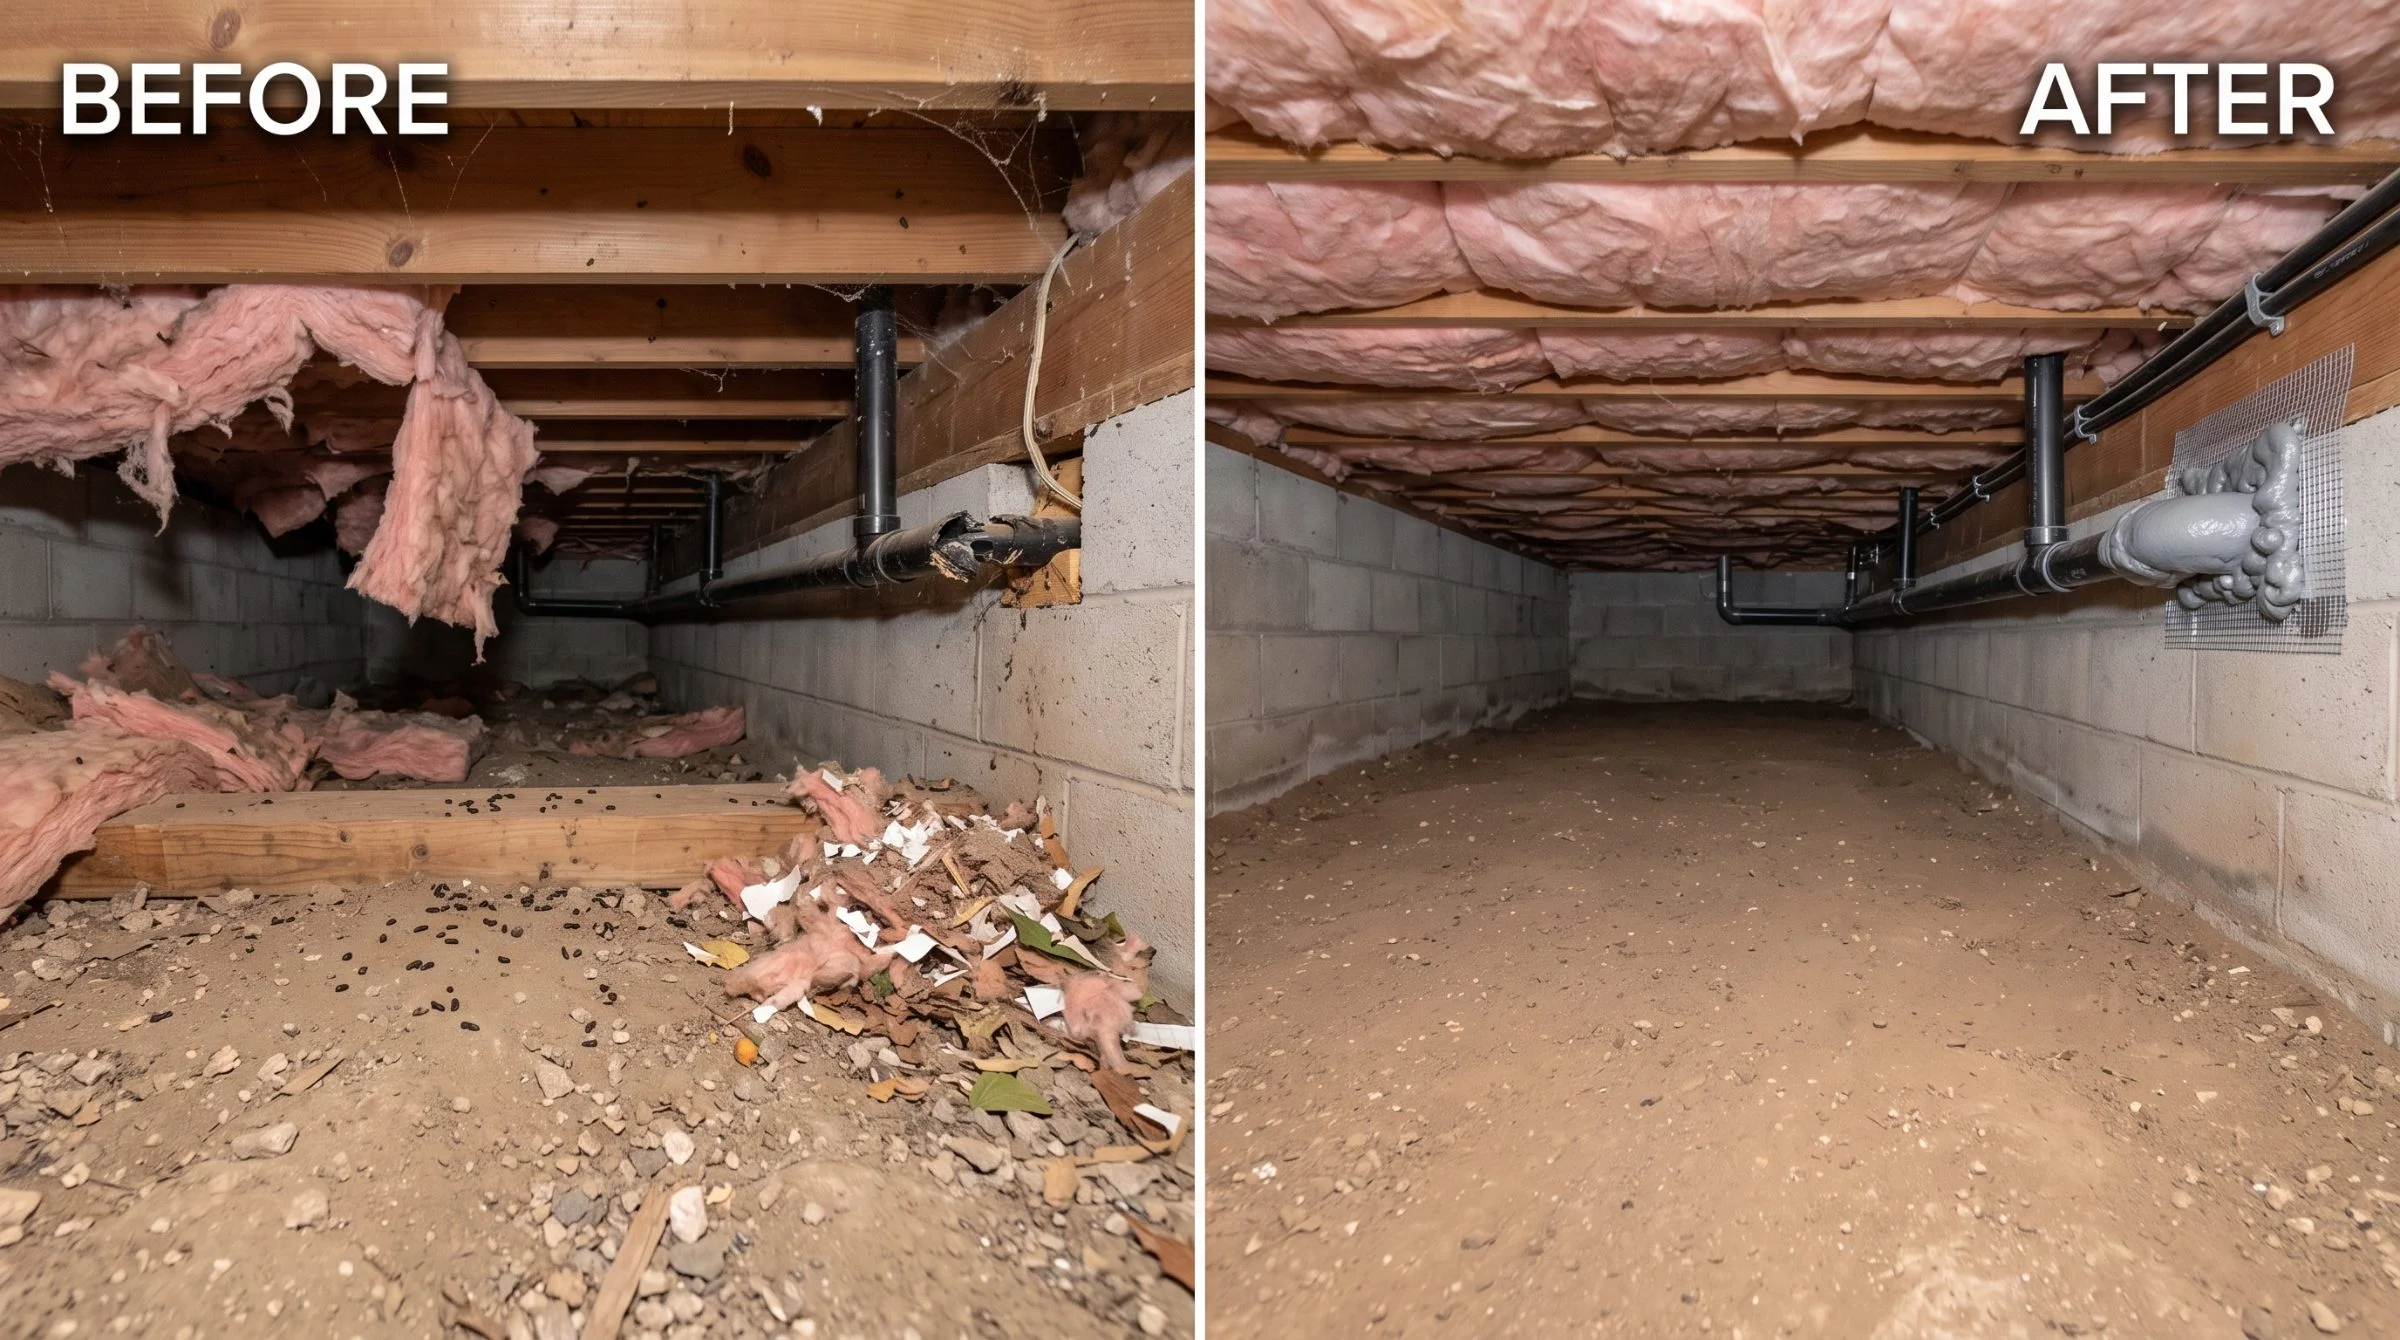
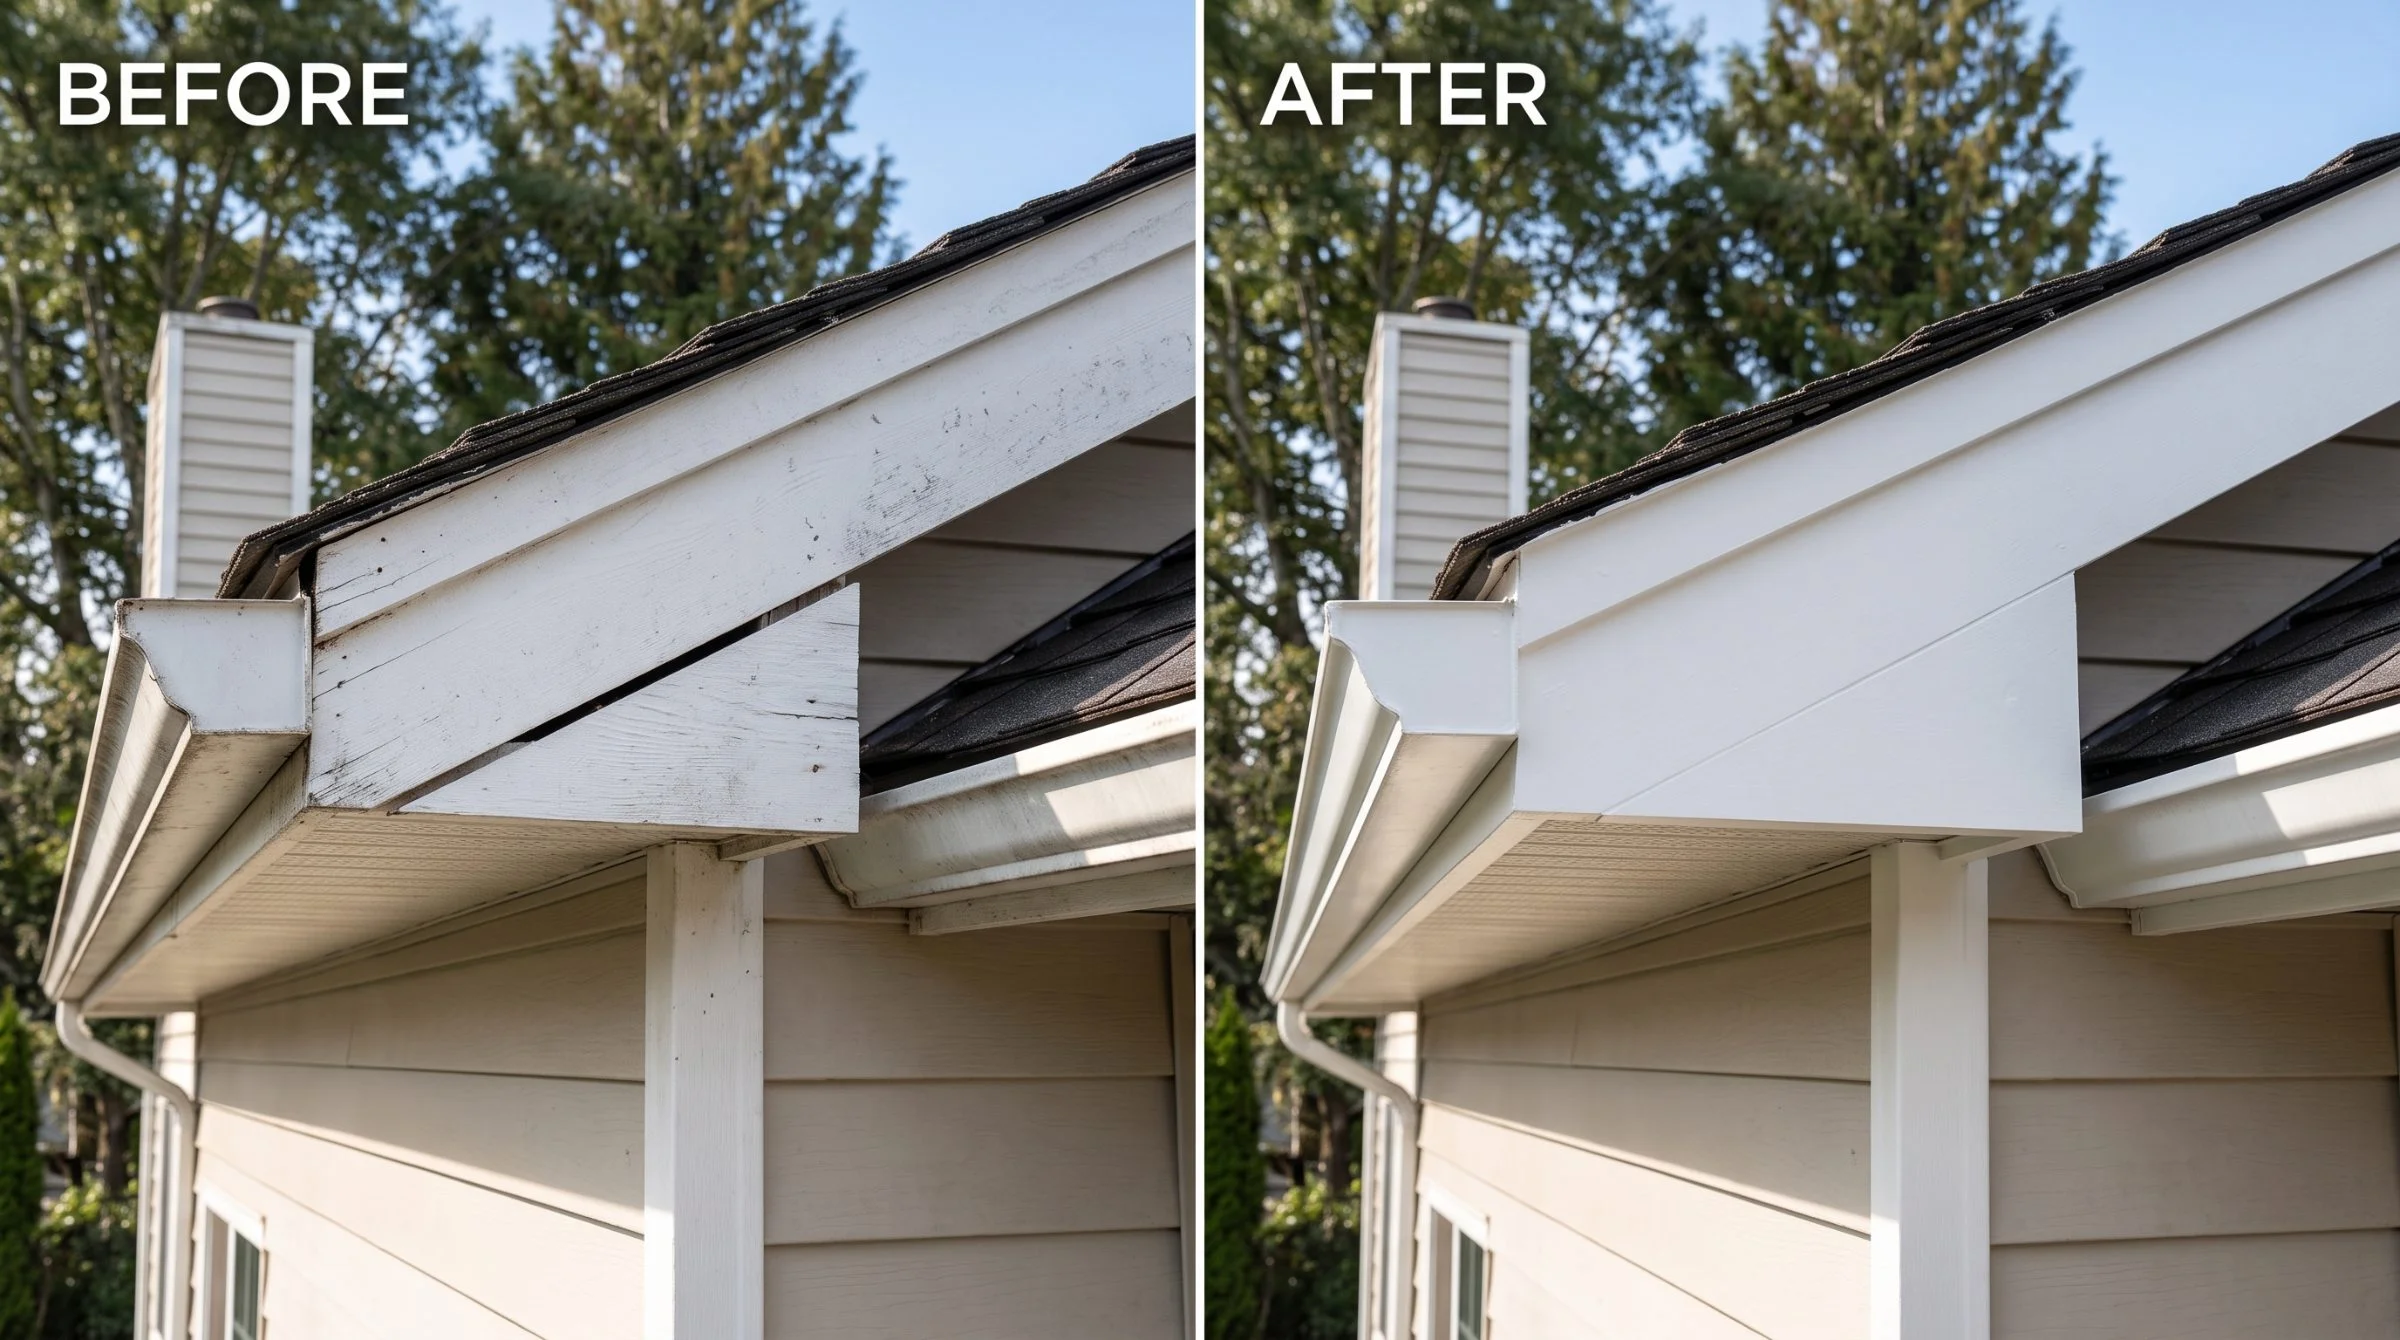
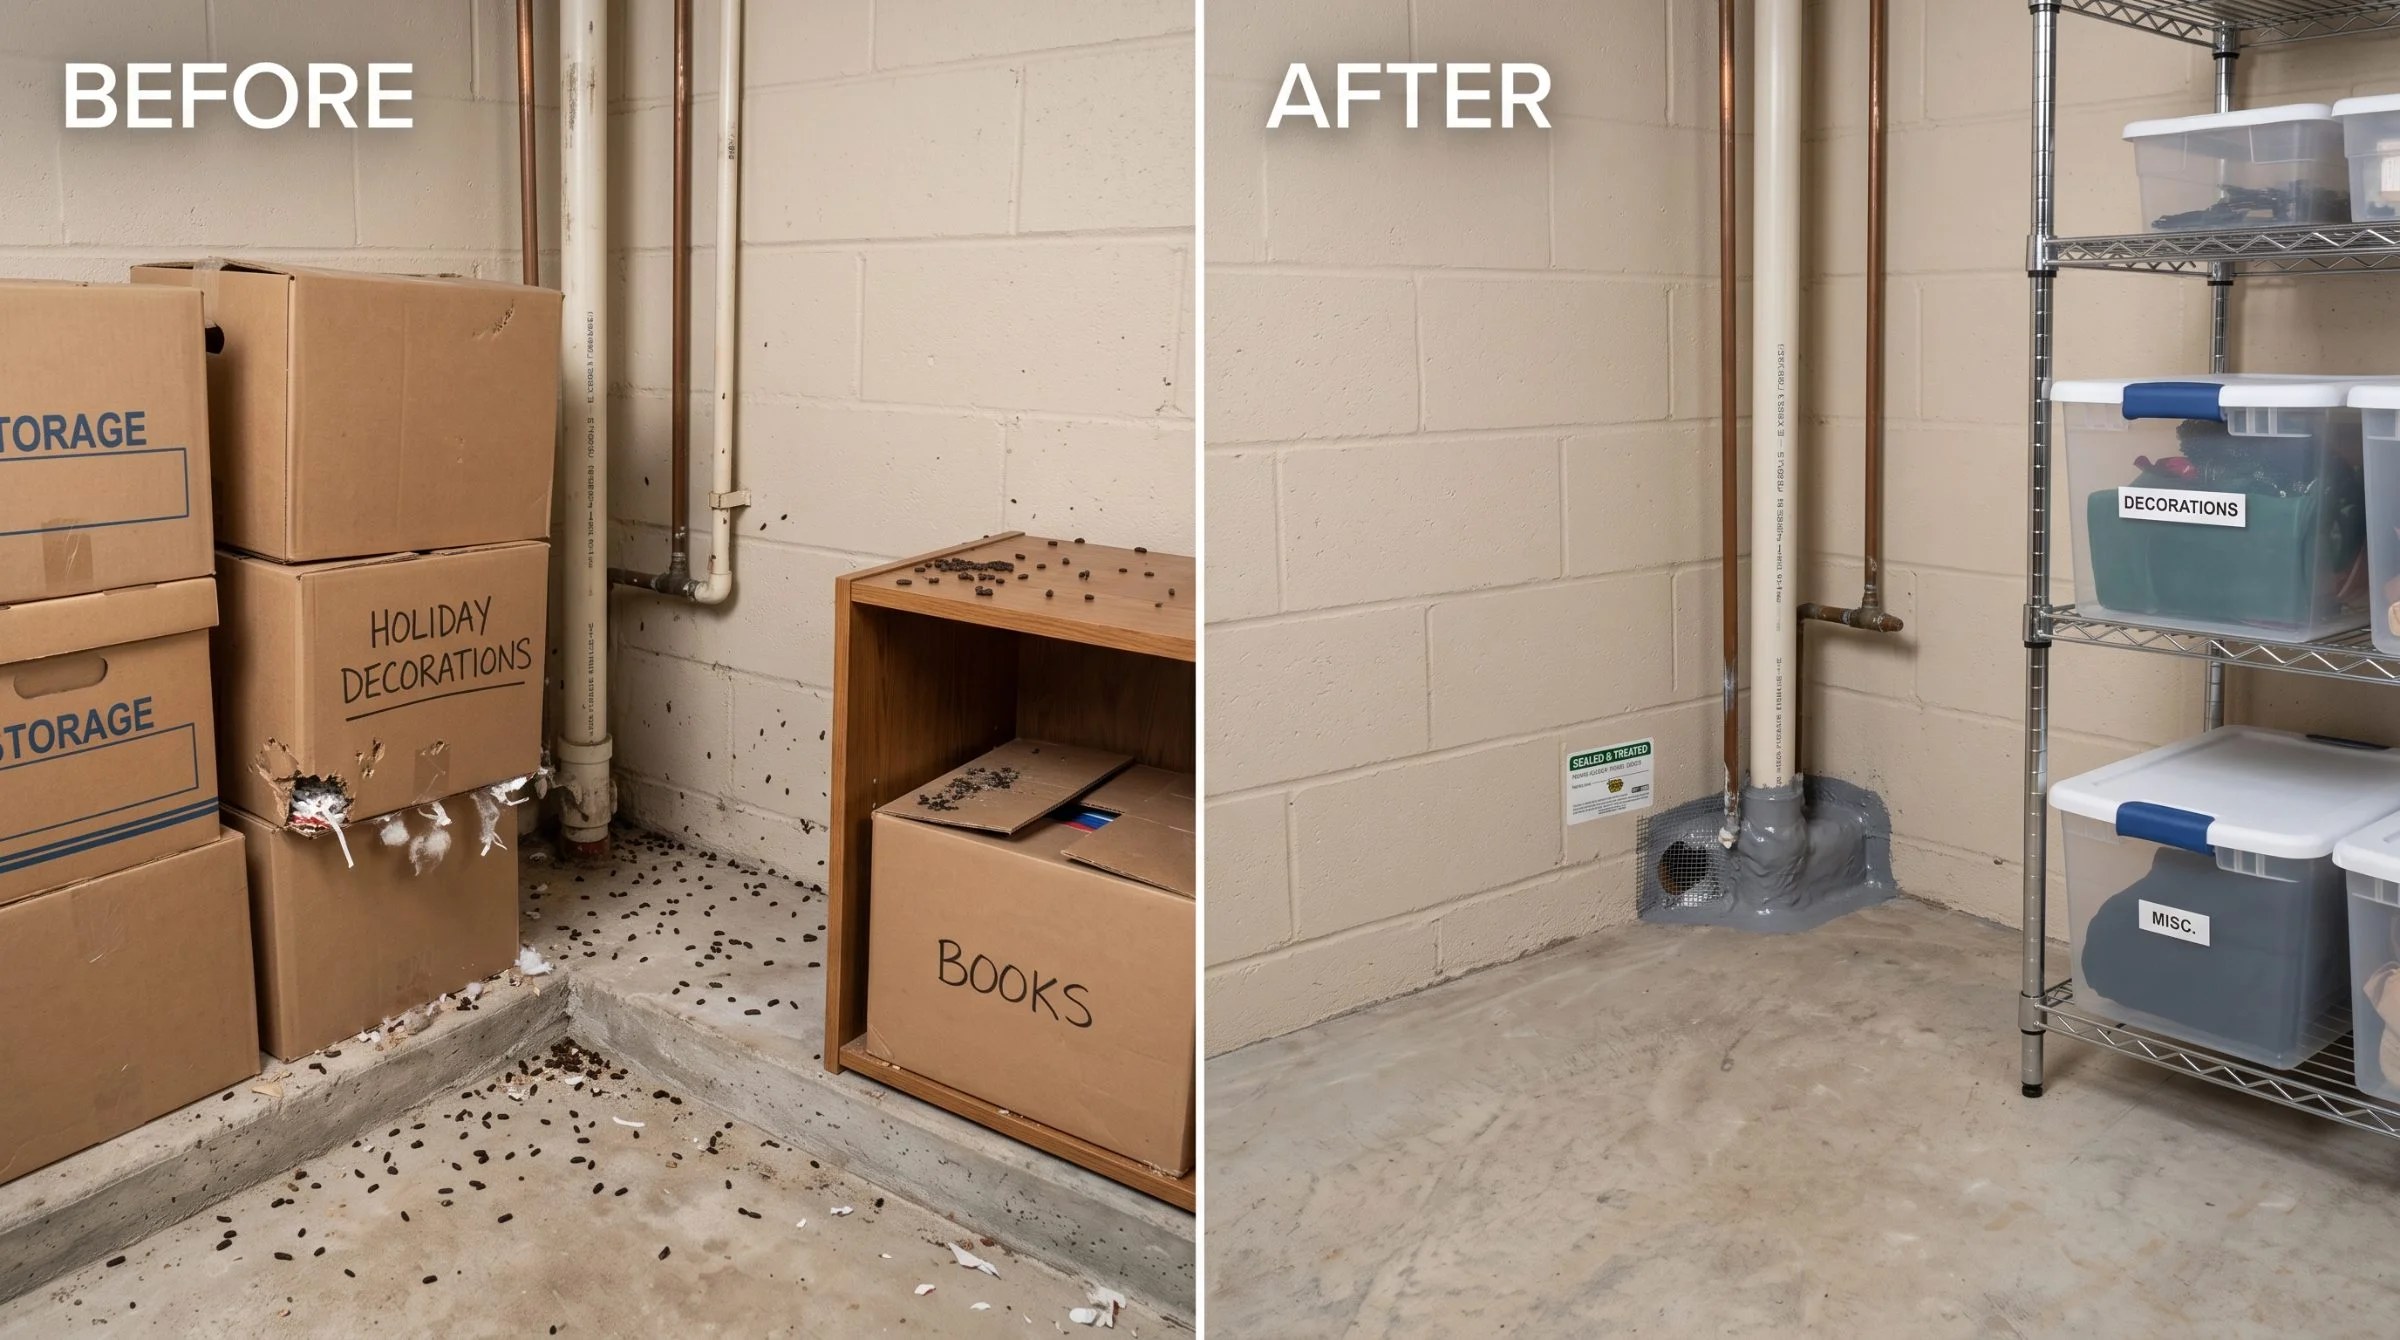
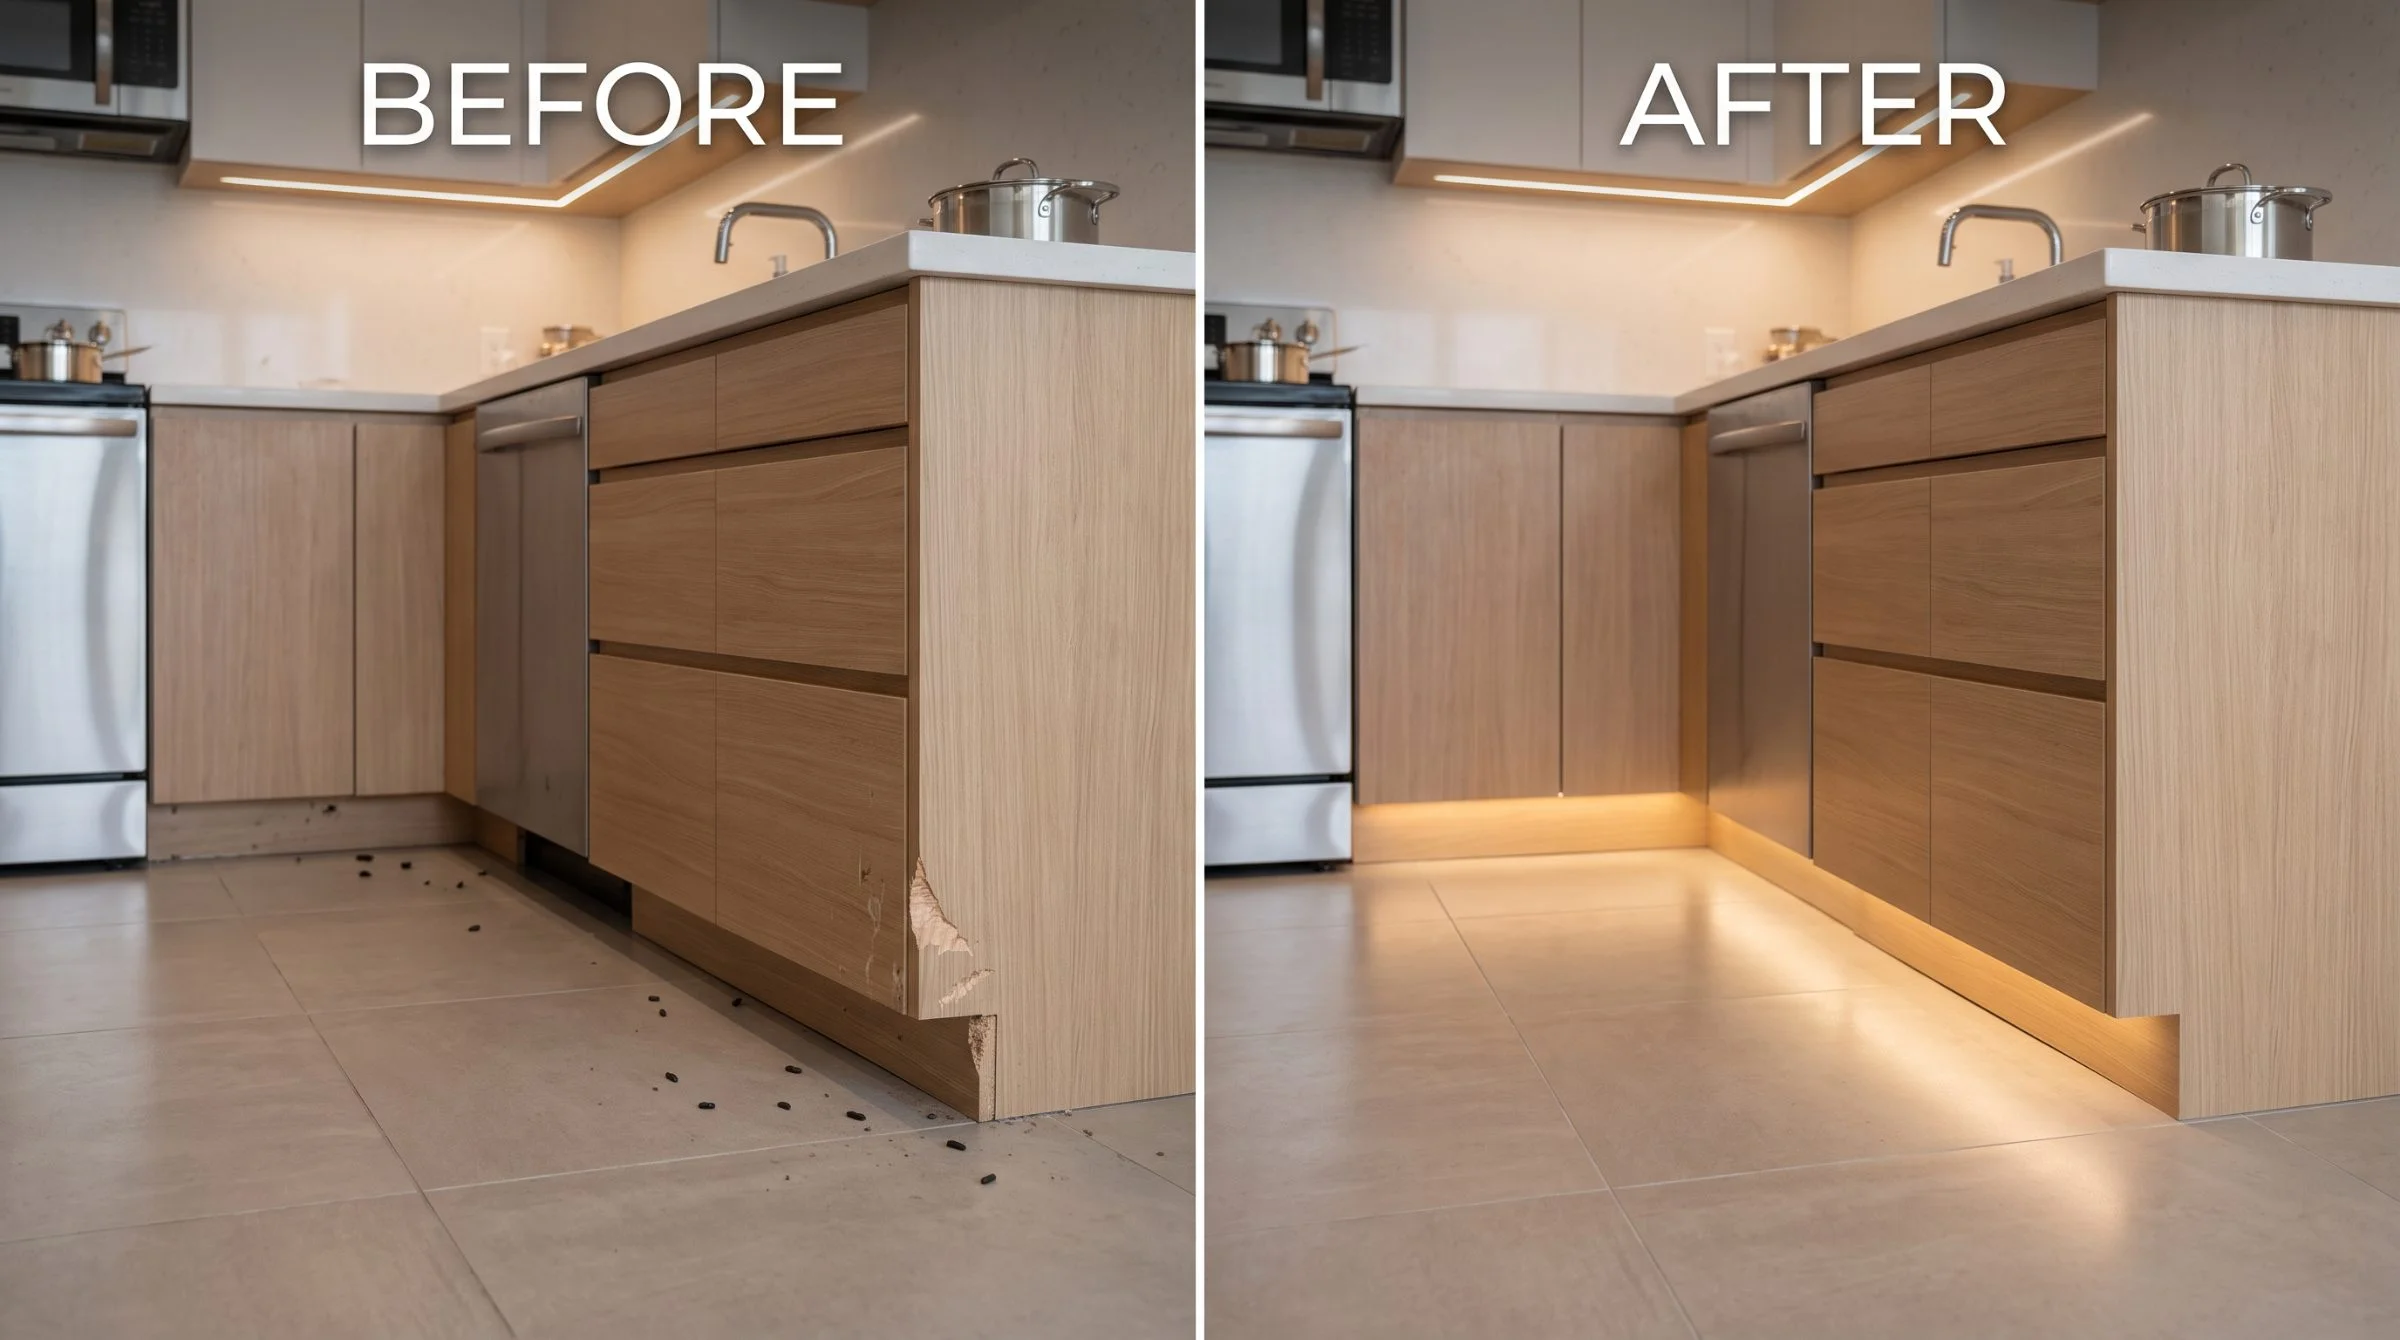
Each pair below is from work we have completed, labelled by the type of work shown. Read the captions as descriptions of the repair rather than as case studies — there are no names, dates or addresses attached to any of them, on purpose.
What a proper seal looks like close up
If you only remember one thing from this page, make it the material.
Steel mesh and hardware cloth. Woven galvanised wire, cut oversize, pushed into or over the opening and mechanically fixed. Rodent incisors cannot get purchase on it and cannot cut it. It is the standard answer for vents, weep holes, open chases and irregular voids.
Metal flashing. Sheet metal cut and folded to the shape of the gap, screwed down, used where a straight run needs closing — a fascia-to-roof-edge gap, a soffit return, a sill line.
Purpose-made vent and weep-hole screens. Manufactured to fit the standard openings, so the finish is clean and the coverage is complete.
Sealant as backing, not as barrier. There is nothing wrong with caulk or foam in the right role: filling behind a steel repair, weatherproofing an edge, finishing an installation. The failure is using either one as the barrier.
Fasteners you can see. Screws, staples, crimped or folded edges. A repair that is fixed stays fixed.
The materials argument in full, including why each of the popular shortcuts fails, is on exclusion and proofing.
What a bad repair looks like in a photograph
You will recognise all of these once you have seen them named.
A beige or orange blob. Expanding foam. It cures soft, a rat opens it in a night, and we have pulled fresh gnaw holes straight through cured foam more times than is funny. It photographs beautifully, which is the problem.
A smooth glossy bead along a joint. Silicone or acrylic caulk. It is a weather seal. It stops water and air, not teeth.
A grey fibrous plug. Steel wool on its own. It rusts, it packs down, and it can be worked out of an opening. Fine as backing behind mesh; not a barrier by itself.
Plastic mesh or window screen. Chewed through without effort.
Tape of any kind. Duct tape, foil tape, flashing tape over a gap. It is a photograph of an intention.
A neat patch with an open detail beside it. One vent screened and the next one open. One weep hole covered in a wall that has ten. Coverage is the job; a sample of the job is not the job.
A row of stations along a wall. Not a repair at all. Nothing in that photograph has been closed, so the opening the animals used is still open behind it. What closing an opening actually looks like is on exclusion and proofing, and the mechanical alternative is set out on poison-free rodent control.
What a photograph cannot show you
Being straight about this is more useful than another gallery.
Whether every opening was found. A photograph proves one gap was closed. It says nothing about the gap on the shaded side of the roof that nobody got a ladder to. That is what the written entry-point list on our process exists for.
Whether anything was still living inside when it was sealed. This is the failure mode that produces a smell in a wall three weeks later. It is why sealing and trapping have to run together, with one-way exits on the active runs and the last openings closed only after the traps go quiet.
Whether the cleanup happened. Droppings, nesting and urine-contaminated insulation are a health matter and a re-infestation matter, and a photo of a sealed vent tells you nothing about either. See attic cleanup and decontamination and droppings cleanup.
Whether it held. The only evidence for that is a follow-up visit, and the only evidence for the follow-up is that somebody came back and checked. Ask.
Whether the repair suits the building. Mesh at a soffit return in a high-wind exposure, flashing on a warped fascia, a screen on a turbine base — these are judgement calls about that specific structure. A photo shows the result, not the reasoning.
Ask for these five photographs on your own job
Whoever you hire. This is a reasonable request and any competent company will already be taking them.
- Each entry point before it is closed, framed wide enough to show where on the building it is.
- The same entry point after, same angle, with the material visible.
- The attic before and after cleanup, from the same position, including the eave space rather than only the walkway.
- Anything removed — contaminated insulation, nesting material, a carcass location.
- A wide shot of each elevation, so the sealed details can be located later. This is the one nobody takes and the one that is worth the most in two years when you cannot remember which side of the house had the gap.
Keep them. If you sell the house, they are the difference between "we had rats once" and a documented repair.
Frequently asked questions
What does rodent exclusion look like when it is done properly?
It looks like grey steel mesh, hardware cloth or metal flashing, cut oversize, mechanically fixed with visible screws or staples, covering the whole opening rather than part of it. It should be identifiable as metal at a glance. If a repair is a beige blob or a glossy bead of sealant, it is foam or caulk and it is not a barrier.
How can I tell if a before-and-after photo is genuine?
Check that both frames show the same fixed reference — the same joist, vent, pipe or brick course — from a similar angle and distance, that the actual repair is visible rather than just a tidied area, and that you can identify the material used. A genuine pair is usually a slightly awkward photograph, because the photographer stood in the same uncomfortable spot twice.
Are the photos on this page your own work?
Yes. Every frame on this page is from rodent work we have completed ourselves — none of it is stock photography. We caption them by work type only, with no dates, addresses, neighbourhoods or customer names attached, because attaching those details to somebody's home is not ours to do.
Why is foam not acceptable for sealing rodent entry points?
Because it cures soft and a rodent can chew straight through it, usually within a night or two. It has a legitimate role as backing behind a steel repair or as a weather seal, but as the barrier itself it only postpones the problem while looking finished.
Can you show me photos of work at my own address before I pay?
Yes. We photograph what we find during the inspection and what we close during the work, and those photographs are yours. That is a better basis for a decision than any gallery, including this one.
Does a sealed house need anything else, or is that it?
The shell is the load-bearing part, but the cleanup matters too, because a building that still smells of a colony recruits the next one. And two maintenance habits keep the shell working: vegetation cut back off the walls, and water leaks fixed. See our process.
How long does a sealed entry point last?
As long as the material and the fixing last, which for galvanised mesh and screwed flashing is a long time. What usually undoes exclusion is not the repair failing but the building changing around it — a new penetration cut for a satellite dish or an AC line, a garage door seal wearing down, a fascia lifting after a storm, vegetation growing back onto a wall. That is why a look over the shell once a year is worth more than anything else you can do, and why you want the wide elevation shots. If you do see activity at a point that was closed, call and describe it.
Do you take before-and-after photos on every job?
Yes, and you get them. They serve two purposes: they show you the work you cannot see, and they locate the sealed details on the building so anyone looking at it in two years knows where to check first.
Main pages Rodent control in Odessa, TX·All rodent services·What it costs·Full service area